:::Welcome:::
My new home for my tutorials, Masks from my old site Enchanted By Darkness.
Hopefully I will get some new tutorials up for you, If my mojo ever comes back!!
••••
Enjoy your visit!
Hugs Rachel
-x-
•Tut Obsessed •
Followers
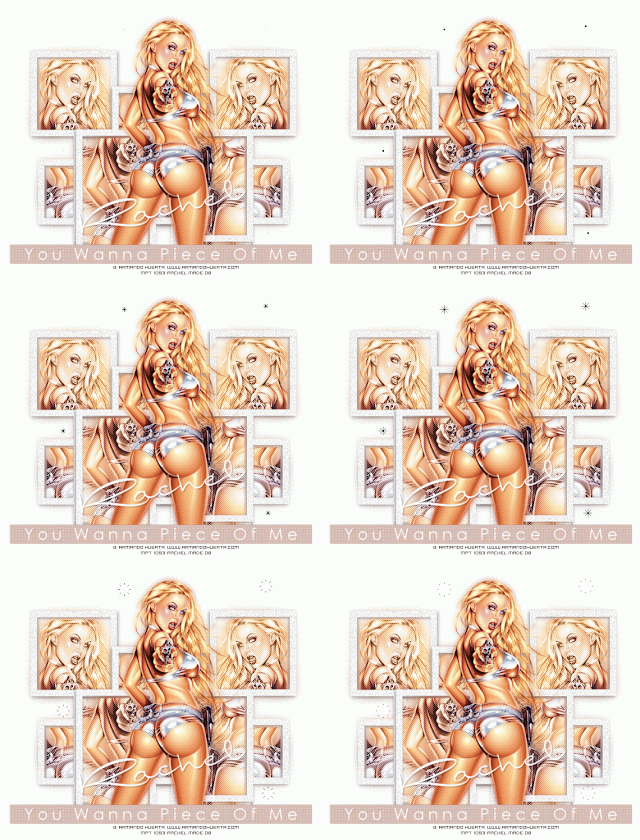
Supplies Needed.
Tube of your choice. I am using the gorgeous art of Armando Huerta.
Only use his art if you have a license.
Sadly Armando does not sell his art anymore.
Frames (Scroll until you find 7 coloured textured frames) - From Arty Pharty Scraps Here .
Thank you Lisa.
Animation Shop.
Penta - Jeans
Mu Ra's Miester - Copies
Font of your choice. I used Century Gothic & International Palms.
Supplies - Here.
Let's get started!
Open up all your supplies & minimize them for now.
Open up a new blank canvas 700x600 fill with white.
Copy & Paste the coloured frames on to your canvas, I used the bottom 1 (Raster 1).
Place into the centre of your canvas. Select inside every part of the frame with your magic wand/Selections/
Modify/Expand 5.
Copy & paste your tube as a new layer & place as you like or see my tag for placement. I added my tube to the frame 2x's .Selections/Invert/Delete.
X out all layers except your tube layers & merge visible. Layers/Arrange/Move down.
Duplicate your tube layer & on the original tube layer go to Adjust/Blur/Gaussian Blur -10.Layers /Arrange
Move down. Making sure you are on the original tube layer, go over to your layers palette & change the blend mode to Luminance legacy or one of your choice.
Go to effects/Filter/Penta. com & use these settings:
Amount -62
Border width - 4. Ok
X out your background layer & merge visible, duplicate/Image mirror. Now move your frames about a bit( see finished tag for reference).
When you are satisfied with the placement of your tube/frames X out background layer & merge visible.
Place the Frames into the center of the canvas.
Copy & paste your tube as a new layer, re size if needed & place into position.
Duplicate your main tube layer & go to Adjust/Blur/Gaussian blur/5.Layers/Arrange/Move down.
Grab your presets shape tool & choose Rectangle. Make sure background is checked with the colour of your choice & foreground is null. Draw out a nice sized Rectangle( see finished tag for reference).
Once that's done convert to raster layer & add your text I wrote " You Wanna Piece Of Me"
I used Century Gothic & changed the Kerning to 200 so it was nice & spaced out. Add a subtle drop shadow to both your text & rectangle.
Then I added my name using the font -International palms.
Add your watermark & correct © info.
Edit/ Copy Merged. Open up Animation Shop & paste your tag as a new animation.
Duplicate your tag until you have 8 frames . Edit/select all. Bring up your twinks select all & place where you like on your tag! Now check to see how your tag looks, crop & save as Gif!
I hope you enjoyed my tutorial as much as I did writing it !!!
..Hugs Rachel..
Any similarities to this tutorial are purely coincidental & unintentional.
Registered with Tutorial Writers Inc.
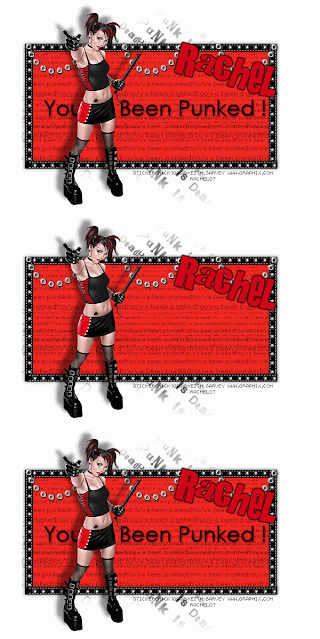
Supplies Here
Tubes of choice, I am using the art of Martin Abel.
Only use his art if you have a license. You can purchase one Here
Template And Frames Created by myself, Please don't change the file names.
Alien Skin Xenofex 2 - Constellation.
Animation Shop.
Font of your choice -I am using Bank Gothic.
Open all your supplies.
Ok on with the tutorial.
Bring up your template, duplicate . You can get rid of other one.
Make sure you're on the template layer & add a new raster layer. Layers arrange/send to bottom.
Then go to image/canvas size change to 700x600.Flood fill white.
Make sure you're on the frames layer.
With your magic wand click inside the large center square. Selections/Modify/Expand 1.
Copy & paste your tube/image as a new layer. Selections/Invert/Delete. Layers/ Arrange/ Move down.
Do the same for the remaining squares. Then X out your background & template layer/ Merge visible.
Turn all layers back on.
Click on your Template layer & duplicate, Making sure you're on the original layer go to:
Adjust/Blur/Gaussian Blur Radius 20.00
Effects/Texture effects/Weave using these settings:
Gap size - 1,Width - 2, Opacity -1, Wave colour - white, Gap colour - white, Fill gaps -Checked, Ok.
- - - - - - - - - - - - - - - - - -
Now grab your text tool using these settings:
Create as vector.
Size - 12, Stroke 2.0, Anti-alias - Off.
Type out the words Willing And Abel or a saying of your choice.[See finished tag for reference].
Place into position & convert to raster layer. Now add your name or any other text you wish to add,
at the bottom of the template. I changed the size of the font to 22.
X out background layer & you can merge visible. And re size the image by 90%.
- - - - - - - - - - - - - - - - - -
With your pen tool draw a line above the Willing And Abel text, use these settings:
Create on vector, Mode-Draw on Lines And Polylines [It's the middle one, diagonal line in a square],
Line style - Solid, Foreground white, Background - Null.
Draw some lines the length of the template [Check finished tag for reference].
X out all layers accept the 2 lines & merge visible. Turn all layers back on now.
Making sure you're on the lines go to Effects/Alien Skin Xenofex 2 / Constellation, using these settings:
Star size - 2.00, Size variation - 50, Edge star density - 32, Overall star density - 10, Overdrive - 100,
Twinkle amount - 71, Twinkle rotation - 45, Make selection transparent - Checked.
Open up Animation Shop.
In Psp go to edit Copy merged and paste as New animation in animation shop.
Back into psp undo repeat the above steps changing the random seed. Make sure you paste the 2nd frame after current frame in Animation shop Do this until you have 3 frames in animation shop.
- - - - - - - - - - - - - - - - - -
Back into psp and add your tube & give it a drop shadow using these settings:
Vertical - Horizontal - Minus 10, Opacity - 15, Blur - 3, Colour - Black.
Add any embellishments, brushes etc.. and the correct © info
Edit copy and paste into Animation shop as a new animation.
Duplicate tube etc so you have 3 frames. Edit select all Copy &Paste into selected frames making sure all frames are selected.
Crop around your image.
Save as a gif & were finished !
I hope you enjoyed my tutorial as much as I did writing it.
..Hugs Rachel..
Any similarities to this tutorial are purely coincidental & unintentional.
Registered with Tutorial Writers Inc.

Supplies needed.
2 tubes of choice. I am using the gorgeous art of Elias Chatzoudis.
Only use his art if you have a license. You can purchase one Here
Font of choice - I'm using TwinklestarRob which is a pay font so I can't supply it.
Scrap kit With Love - © Scrappy dayz Thank you Fee.
Mask By Chelle - Here.
Thank you Chelle Mwahh.
Supplies
Let's get started.
Open up all supplies and minimize for now. New canvas 700x600 flood fill white we can resize later.
Bring up Fee's scrap kit, Choose the lace trim, copy & paste as new layer onto your canvas.
Resize 85%, duplicate/image/flip. Place into position (check finished tag for reference).
X out your white background layer & merge visible. Duplicate Rotate left 90 degrees. Place into position.
X out background layer again & merge visible. So now we have a frame!
With your magic wand click inside the frame, Selections/modify/expand by 5.
Pick a paper from the kit, copy & paste it as a new layer. Selections/Invert/delete.
Selections/None. Layers/arrange/Move down .So it should be under your frame layer now.
Give the frame layer a subtle drop shadow.
Copy & paste one of the ribbon streamers & resize, place into position.
Copy & paste one of the bows and resize,
so they are small enough to fit along the bottom of the frame
(check finished tag for reference)
On your frame layer, click inside with the magic wand/selections modify/expand 5.
Add one of your tubes, resize if needed. Selections/invert/delete. Add a drop shadow to your tube.
Move under your frame layer.
Add your other tube, resize if needed & give a subtle drop shadow.
Choose another paper from the kit, copy & paste as a new image.
Go to layers/New mask layer/from image & find Chelle's WSL_Mask75.
Source luminance - Checked. Invert mask data- Unchecked. ok
On your layers palette Merge group.
Copy , Click on your background layer & paste the mask.
Add your text & any other embellishments you want to add.
Add your watermark ©info..
Merge visible & save as Jpeg or Png!
That's it were done!
I hope you enjoyed my tutorial as much as I did writing it !!!
..Hugs Rachel..
Any similarities to this tutorial are purely coincidental & unintentional.
Registered with Tutorial Writers Inc.
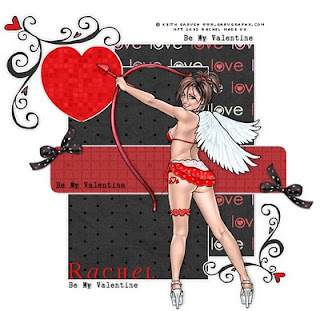
Tutorial written in Psp 9
Supplied Needed.
Tube of choice - I am using the gorgeous art of Keith Garvey.
You must purchase a license to use his art from MPT.
Valentine Girl Template.
Scrap Kit - Ps I love You - Creative Delusionz.
Thank You Dee xox.
Xero -Fritillary (Optional).
Font - Will & Grace.
Ok let's get started.
Open up all your supplies.
Bring up my template & duplicate. You can close the original down now.
On the template click on the background layer, Go to Image canvas size & width 700 &
Height 650. We can resize later.
X out all layers except the Black Rectangle layer.
Go to selections/select all/Selections float/de float/Modify - Expand by 1.
In the scrap kit choose a paper of choice/ Copy & paste as a new layer/Selections/Invert/delete.
Keep selected & click on invert again/Modify/Expand 3. Add a new layer below the paper layer , fill with white or a colour of your choice, Add a subtle drop shadow.
Delete the Black Rectangle layer.
Next click on the Grey Rectangle layer, Place into position & Do the same as above using a different paper from the kit.
Delete the Grey Rectangle.
Next click on the Grey Strip. Place into position, Do the same as above using a different paper.
Now add your Tube & place into position, Add a subtle drop shadow.
Un x the Heart & place into position, Do the same as above or just fill the heart with a colour of your choice.
Add a subtle drop shadow.
Optional
I used Xero - Fritillary - With these settings:
Granularity - 10/Aggression -30 /Tesselation - 100 /Variation - 15.
Now you can add the Word Art & Embellishments of your choice.
Add your text, Watermark & correct © info , Resize.
Save as Jpeg or Png!!
I hope you enjoyed my tutorial as much as I did writing it !!!
..Hugs Rachel..
Layout and Tutorial ©Rachel written on January 15th 2009.
Any similarities to this tutorial are purely coincidental & unintentional.
Registered with Tutorial Writers Inc.
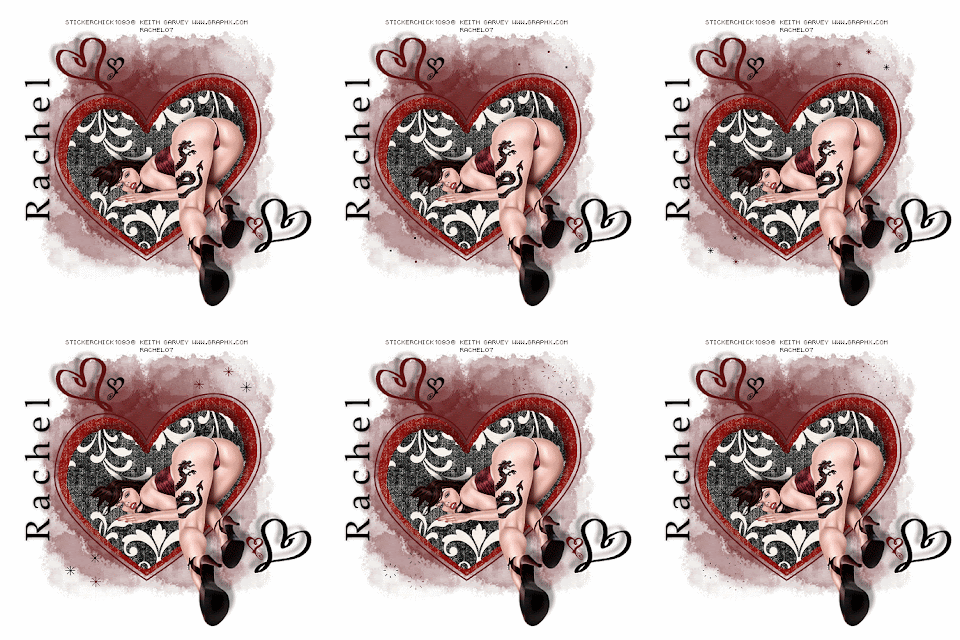
Twinky Hearts
Artwork By ©Keith Garvey.
You MUST not use the work of this artist unless you have a license ,
which you can Purchase Here.
All my tutorials are made with Paint shop pro v'9, but im sure it can be done in other versions.
You will need some nice scrap papers
The ones I used were Dinner Party Kit from Here
Mask : Becky_Mask022.
Thank you Becky!
Font Of Choice.
Ok on with the tutorial.
Open a new blank canvas 600x600 fill with white
Copy & paste the large Heart1 Tube & paste as new layer, Click inside with your magic wand/selections modify/contract 5
Copy one of your papers & paste as new layer onto the heart. Selections/Invert/Delete./Select None.
X out background & merge visible.
Bring up the other heart [small heart1] & place into position, repeat as above but use a different paper.
Delete the small heart 1 layer, Add a drop shadow to the paper heart.
Vertical -12
Horizontal 9
Opacity 35
Blur 9.00
Colour -Black
X out background & merge visible.
Choose a nice colour from your tube & open up a new canvas and fill with that colour.
Layers/Mask/Load Save Mask/ Becky_Mask022
Check source luminance.
Check fit to layer.
Check hide all mask.
Uncheck invert transparency.
Merge Group, Copy & paste as a new layer /layers arrange move down.
Make sure you're on the top layer copy & paste your tube as a new layer ,add same drop shadow as above.
Bring up the small heart tubes copy & paste as a new layer [see tag for reference.]
Add a drop shadow.
Vertical -9
Horizontal-10
Opacity 35
Blur 9.00
Add your text , any © Info & your watermark.
You can now leave as is or carry on and add the twinks.
Open Animation Shop .
Go back to Psp & resize tag if needed copy merged , back to animation shop & paste as new animation.
Minimize tag for now & find your Twinks, when you open them up you will see that they have 8 Frames.
You will have to duplicate your tag 7 x's for a total of 8 frames.
Grab your twinks /edit select all copy & paste onto your tag make sure all tag frames are selected.
Place into position, Once you are happy with your tag & placement of twinks save !
I hope you have enjoyed my tutorial !
This Tutorial was created By Rachel on the 18th January 2007.
Any simularities to this tutorials are purely coincedental & unintentional.
Tutorial written using Psp9
Supplies Here
Tube of choice, I am using the gorgeous art of Elias Chatzoudis.
Only use his art if you have a license. You can purchase one Here
Scrap Kit - By Lisa Sophisticated Scraps Here
Thank you Lisa!
Mask - Made By Myself. Please do not change the filenames.
Template.
Font of choice - I'm using CAC Shishoni Brush which is a pay font so I cannot supply.
Open all your supplies.
Ok on with the tutorial.
New blank canvas 500x500 copy & paste a scrap paper from the kit. I used Paper 4,
Go to layers/New mask layer from image .
In the drop down menu find EDB Mask4. Making sure that source luminance is checked.
On your layers palette delete the mask layer & click yes to the pop up box, Then merge group.
Click on your background layer & go to Image/canvas size, change to 700 x 600. Flood fill this layer white.
Making sure you're on the top layer, copy & paste the wording as a new layer.
Copy & paste your tube as a new layer & add a drop shadow. Resize if needed.
Now add any embellishments, text ,watermark & correct © info.
And that's it were finished !!
I hope you enjoyed my tutorial as much as I did writing it !!!
..Hugs Rachel..
Layout and Tutorial ©Rachel written on July 11th 2007.
Any similarities to this tutorial are purely coincidental & unintentional.
Registered with Tutorial Writers Inc.

Supplies
Pin - I've had this for ages and all I know is that it was made by Itty Bitty.
Font - 2Peas Primitive [ Pay Font ]
Art work used Suzanne Woolcott .
You must have a license to use her art which you can find Here
Ok let's get started.
1, Open up a 550x550 Blank canvas & flood fill white.
Open up your swirls, Choose which one you would like.
Resize to your likening /Duplicate/Resize/Image/ Mirror.
[See finished tag for reference]
X out background layer & Merge visible.
Add a drop shadow:-
Vertical 1/Horizontal 0/Opacity 25/Blur 10.00/Colour Black.
2,Grab your preset shapes tool & choose rectangle/Create on Vector/ Foreground Null/ Background white.
Draw out a rectangle not too big.
[See finished tag for reference]
Add the same drop shadow as before, Click inside the rectangle with your magic wand.
Selections/Modify/Contract 10. Copy & paste your Tube/Image/Selections/Invert/Delete.
X out all layers except the Rectangle & Image layers & Merge visible.
3, Open up your flowers. Draw round a flower with your selection tool/Copy & Paste as a new image.
I changed the colour on my flower /Adjust/Colourize/Hue & Saturation Both 0.
Now copy & paste the flower as a new layer on to your canvas, Resize to your likening & place into position.
[Check finished tag for reference]
Add the same drop shadow as before .
4, Click on your bottom layer over on your layer palette.
Preset shapes Circle :-Create on vector/Line style - Dot/Line width - 2.00/Foreground - Black.
Draw out some circles
[See finished tag for reference]
5, Now add your bows, pin etc & any other embellishments you would like to add.
Add the correct © & watermark & were done !
I hope you enjoyed my tutorial as much as I did writing it.
Hugs Rachel.
Tutorial created 23rd March 2007.
..Hugs Rachel..
Any similarities to this tutorial are purely coincidental & unintentional.
Registered with Tutorial Writers Inc.
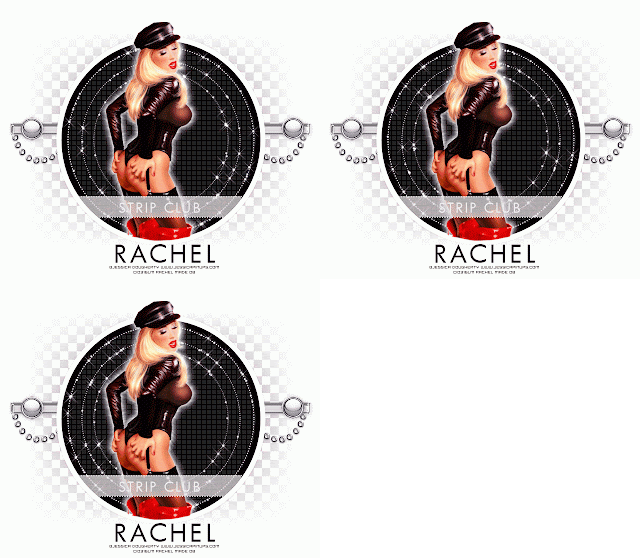
Tutorial written using Psp9 And Animation Shop.
I am using the gorgeous art of Jessica Dougherty, to use his art you must purchase a license.
You can get one Here.
Filters
Eye Candy - 4000 - Corona.
Alien Skin Xenofox 2 - Constellation.
Font of your choice - I'm using Future BK.
Open up all your supplies & minimise for now.
Open a new blank canvas 700x600 fill white, we can resize later.
Copy & paste all the supplies as a new layer onto your canvas [check finished tag for reference], they should all be in order.
Add a subtle drop shadow to all supplies.
On your tube layer add a subtle drop shadow. Then go to Effects/Eye Candy 4000/Corona.
Use these settings:
Glow width - 17.98
Flare size - 1.98
Stretch - 100
Waver - 23
Blur - 0
Overall Opacity - 100,Colour white or one of your choice.
Draw only outside selection - Checked.
If you don't have this filter I'm sure it can be done just by adding a thick drop shadow & high opacity.
Add your watermark, Text & correct © info.
Making sure you are on the Sparkle Dots Circle,
Duplicate Resize 85%,Duplicate again & Resize 85%.
Rename them Sparkle1,Sparkle2,Sparkle3. 3 being the smallest circle.
Starting on Sparkle 1 use
Go to Effects/Xenofex 2/Constellation. Use these settings:
Star size - 6.52
Size variation - 25
Edge star density - 1
Overall Star Density -1
Overdrive - 100
Twinkle amount - 100
Twinkle rotation - 45
Keep original image - Checked. Ok.
Then on sparkle2 use the same settings except change the Random seed, Repeat for sparkle3
changing the random seed.
Edit/copy merged & paste into As, Back into Psp edit undo All the Sparkle layers.
Now do the same as above, but remember to keep changing the random seed on every sparkle layer.
Edit/Copy Merged paste into As, after current frame. Now repeat the above steps once more remembering to change the random seed each time. Edit /copy merge & paste after current frame in As.
You should now have 3 frames,
Test your animation if you're happy crop & save as Gif!!
I hope you enjoyed my tutorial as much as I did writing it !!!
..Hugs Rachel..
Layout and Tutorial ©Rachel written on February 12th 2007/ Updated July2nd 2008.
Any similarities to this tutorial are purely coincidental & unintentional.
Registered with Tutorial Writers Inc.

Tutorial written in Psp9.
Supplies Needed.
Tube of Choice - I am using the gorgeous art of Michael Landedfeld.
The tube I am using has a Close up included.
You must only use his art if you have purchased a licence, You can Purchase one Here.
Scrap Kit of choice- Or the one I am using which is Called Wild Sorbet By Michelle Coleman.
You can download it from The Memory Makers site Here.
Font - I am using Water Brush Rob [Pay font] .
My Template#30 - Which you can download from my Blog Here.
You will find the template under Templates & wordart links 27-41
No outside filters needed.
Ok let's get started!
Open up all your supplies and minimise them for now.
1,Open up my template & delete the info layer. X out all layers except the Hearts mask layer.
Copy & paste a paper of your choice above the Hearts layer, resize as needed.
On your layer palette change the paper layer to Overlay. Do Not merge these 2 layers together.
2, Un x your circle layer. Selections/select all/selections float/Defloat copy & paste a paper of your choice
as a new layer,resize the paper. Selections/Invert /delete. Select none. Add a subtle drop shadow.
3, Un x your left bracket. Selections/select all/Float/Defloat.
Copy & paste another paper of your choice as new layer, resize. Selections/Invert/Delete.
Now click back on the original bracket, select it/Modify/ Expand 3.
Add a new raster layer & fill with white or a colour of your choice. Add a subtle drop shadow.
Do the same as above with the right bracket.
4, Un x the Dotted circle . Now you can add any colour or paper what you want here.
I just changed the Brightness / contrast to white.
5, Un x the black frame. Selections/select all /Float/defloat, Copy & paste a paper of your choice
as a new layer,resize/invert/delete. Select the black frame again, Modify expand - 3.
Fill with white or a colour of your choice. Add a subtle drop shadow.
6, Un x the inner frame, Copy & paste your close up tube as a new layer resize.
7, Un x out the Heart, I just changed the Hue & saturation to a colour from the kit.
Add your main tube & any embellishments from the kit!
Add your text and correct © info.
That's it were finished save as a Jpg or Png!
I hope you enjoyed my tutorial as much as I did writing it !!!
..Hugs Rachel..
Layout and Tutorial ©Rachel written on September 11th 2008.
Any similarities to this tutorial are purely coincidental & unintentional.
Registered with Tutorial Writers Inc.

Tutorial written using Psp9
Tube of your choice. I am using the gorgeous art of Martin Abel, only use his art if you have a license.
You can purchase one Here.
Font - Will & Grace Here.
Filters
Eye candy 4000 - Corona or Gradient Glow.
Heart Clouds - © Rainbow Coffi. Thanx
Mask by Becky, Thanx.
Supplies
Ok on with the tutorial.
Minimize supplies for now.
Open up a new canvas 450x450 & fill with a colour from your tube.
Go to layers/new mask layer from image & find Becky Mask_042,Source luminance - checked, Invert mask data - Unchecked.Ok
On your layers palette right click on the mask layer & delete, Click yes to the pop up & merge group.
Add a new raster layer & fill white/Image/canvas size, Change to 700x600.Layres arrange/send to bottom.
Back onto your mask layer & move it over to the left/duplicate /image/mirror & place into position see finished tag for reference.]
Once happy with the position, Turn off your background layer & merge the mask layers visible.
Turn background layer back on.
Bring up the barbed wire, I have included 2, 1 blue & the other grey. Copy & paste as new layer onto your canvas & resize by 85%.Add a slight drop shadow.
Bring up the Heart clouds & choose one to match the colour of your tube. Making sure you are on the makes layer copy & paste as a new layer, move over to the left/duplicate/image/Mirror. Place into position. Turn off all layers & merge the clouds visible. Turn off your background layer & merge visible move the merged layer down to the bottom of the canvas.
Turn background layer back on.
Bring up your tube resize as needed & place so she is sitting on the barbed wire, Add a drop shadow:
V/H -2,Opacity - 50,Blur 7.00,Colour - Black. If you are using the same tube add the other image resize by 65% and place it as if it's sitting on her hand. Add the same drop shadow.
Now add the doodles resize/duplicate/image /mirror & place into position [see finished tag for reference].
Optional: Add the corona effect found in Eye candy 4000 or a gradient glow using a colour from your tube.
Add tour text, I used Will & Grace using Caps.
Add your watermark, correct © info. Crop & re size!
Save as Jpeg or Png.
I hope you enjoyed my tutorial as much as I did writing it !!!
..Hugs Rachel..
Layout and Tutorial ©Rachel written on March 10th 2008.
Any similarities to this tutorial are purely coincidental & unintentional.
Registered with Tutorial Writers Inc.
Supplies
Paint Shop Pro - I'm using Version 9 , But im sure it can be done in other versions.
Toadies - What are you.
You will need 2 Patterns You can find the ones I used Here under Misc, Please follow Suzanne Woolcotts TOU
I am also using the gorgeous artwork of Suzanne Woolcott,
If you would like to use Suzanne's art you must purchase a license Here Or More Art Here.
You will need Tubes/Images from the same artist. You can use as many as you like .
Elements of your choice.
Font of your choice - I'm using CK Fresh. { Pay font }
Ok let's get started.
1, Open up a new blank canvas & Flood fill white.
Grab your preset shapes tool & choose Rectangle / Vector/Line style Solid/
Foreground Null / Background white .
Draw out a nice sized Rectangle
[See finished tag for reference]
Convert to raster layer, Click inside the rectangle with your magic wand [Tolerance 20/Feather 0]
Selections /Modify/Contract 5
Selections/select none.
Flood fill with one of your tiles. Add a drop shadow :
H/V / 0
Blur / 10
Opacity / 20
Colour / Black
2, Grab your preset shapes tool & use same settings as above , But draw out a smaller square /Convert to raster layer
Duplicate/Image /Mirror.
Selections/Modify/Contract /5
Add your Tube/Image/Resize if needed/Selections/Invert/Hit delete.
Repeat in the opposite square.
X Out background & the large rectangle & merge the 2 squares & images. Add the same drop shadow.
Turn background & large layer back on.
3, Grab your preset shapes tool again but change the shape to Ellipse, Draw out a circle not too big
[check finished tag for reference]
Place the circle between the 2 squares & convert to raster layer.
with your magic wand click inside the circle using same settings as above [step 1]
Selections /modify/contract 10, Flood fill with a different tile.
Bring up one of your tubes/images /copy & paste as new layer /resize if needed /selections invert/delete.
Selections/select none. X out all layers except the circle layer & the image/tube/merge visible.
Add the same drop shadow as before. X out background layer & merge visible.
4, Duplicate your main image /Resize 85% , On the original layer go to Effects:
Toadies/what are you :
X- Dose 20
Y - Dose 20
Ok lower the opacity of this layer to 50.
Add any embellishments & your text.
I used different colours from my tiles & placed letters 1 by 1 .
Add © info & your watermark & you're done.
I hope you enjoyed my tutorial as much as I did writing it !!!
..Hugs Rachel..
Tutorial created on the 23rd February 2007.
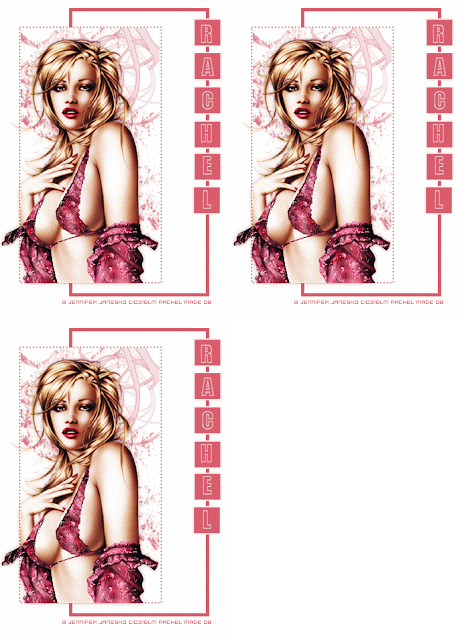
Supplies Needed.
Paint Shop Pro, I am using version 9.And Animation Shop.
Tube/Image of choice. I am using the beautiful art of Jennifer Janesko.
You must purchase a license to use her work you can get one Here.
Brushes of Choice
Font - Impact
Filters
DSB Flux - Bright Noise.
Ok on with the tutorial.
1, Open up a new Blank canvas 500x500 Flood fill white.
Copy & paste your tube/image as a new layer, resize if needed.
Add a subtle drop shadow.
2, Choose a colour from your tube Fill with that colour & Background Null.
Choose your preset shapes tool, rectangle
Create as vector
Ant-alias - checked.
Line style - Dots.
Width - 2
Draw a square around your tube, making sure you leave enough room to add the brushes.
[check finished tag for reference]
2, Add a new raster layer & choose the selections tool, rectangle & draw around the dotted rectangle.
add a new raster layer/layers arrange move down & add brushes, embellishments.
3, Grab your presets shape tool again same setting as before only change the line style to solid.
Draw another rectangle [see finished tag for reference].
4, Now were going to add the text. So with your preset shapes tool.
Fill colour of choice & background white draw out some squares, make a square
and duplicate to the amount of letters you have in your name.
Place into position [see finished tag for reference]
Add your letters 1 by 1, I used Impact size 25. Add a subtle drop shadow to the letters & squares.
X out all layers except the squares & letters & merge visible.
Optional.
I chose to animate the bikini using Dsb flux bright noise with settings:
Intensity -25
And Mix- Checked.
Once animated add correct © info & watermark save!
That's it were done!
I hope you enjoyed my tutorial as much as I did writing it !!!
..Hugs Rachel..
Layout and Tutorial ©Rachel Re written on January 1st 2008.
Any similarities to this tutorial are purely coincidental & unintentional.
Registered with Tutorial Writers Inc.
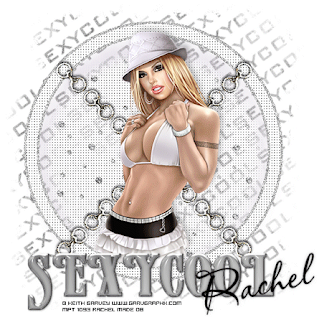
Tutorial written using Psp9
Supplies
I am using the gorgeous art of Keith Garvey, Only use his art if you have a license.
You can purchase one Here.
Diamond Overlay & Chain. If you know who these belong to, or if it's yours, please contact me here
so I can give proper credit or remove them.
Thank you!
Mask is by Chelle , Thanx Hun ♥
Word art- made by myself, please don't pass around or change filename.
If you are a tut writer & would like to use it in one of your tut's please contact me for permission.
Tag back, Weave Ring & Glitter Ring.
Font Of choice.
Dsb Flux- Bright noise.
Ok on with the tutorial.
Open up all your supplies & minimize for now.
New blank canvas 700x550 flood fill white.
Copy & paste the tag back as a new layer.
Choose a colour from your tube ,Open up a new canvas & fill with that colour.
Go to layers/New mask Layer from Image & find chelles Mask WSL_mask29
Source Luminance - Checked. Invert Mask Data - Unchecked.
Layers/Merge group.
Repeat above steps only changing your fill colour to white add the mask as above.
Image/Resize/85%.
Effects/Texture Effects/Weave. Use these settings:
Gap Size - 1
Width - 3
Opacity - 100
Weave Colour - White, Gap colour black. Fill Gaps - Checked.
Copy & Paste the Diamond Overlay above the 2nd mask layer we just made.
Change Blend mode in layers to Overlay resize 85%.
Copy & Paste the glitter ring as a new layer & the Weave Ring.
Copy & paste the chain as a new layer & rotate by 45 degrees to the left or right,
Duplicate Image/Mirror & place into position [see finished tag for reference]
Add your tube as a new layer, I removed some of her bottom half with the eraser tool.
Add a subtle drop shadow of your choice. Add the Sexy Cool Word art or a saying of your choice.
Now add any other embellishments ,text,© info & your watermark.
You can now leave like it is or carry on with the animation.
Animation
Open up animation shop, go back to psp . make sure you are on the Glitter Ring layer.
Effects/Dsb Flux/Bright Noise with these settings:
Intensity - 50
Direction - mix
Click ok. Edit/copy merged & Paste as a new animation in As.
Back into psp Edit Undo,Repeat the above steps but click on Mix 2x's Edit/Copy merged Paste after current frame in As.
Back to psp Edit Undo, Repeat above steps again only now click on mix 3x's Edit/Copy merged & paste after current frame in As.
Resize tag if needed & crop off any unwanted background.
Save as Gif & were finished!
I hope you enjoyed my tutorial as much as I did writing it !!!
..Hugs Rachel..
Layout and Tutorial ©Rachel written on February 1st 2008.
Any similarities to this tutorial are purely coincidental & unintentional.
Registered with Tutorial Writers Inc.
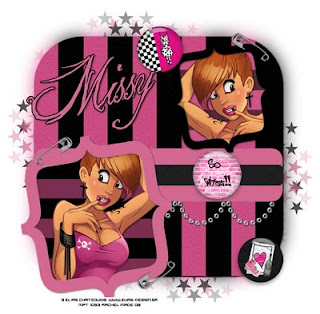
•••
Tutorial written in Psp9.
Supplies Needed.
Tube of your choice - I am using the gorgeous art of Elias Chatzoudis.
You must purchase a license to use his art from MPT.
My Template #39 - You can download from My Blog.
Look under Templates & WordArt links 27-41
Just A Rebel Buttons - You can download from Missy's Blog - Divine Intentionz .
Thank you Missy ♥
My Mask EBD#77
And a paper of your choice- Or the one I have included.
Font of choice - I am using The king & Queen font Here
Penta.com - jeans. [optional]
Ok lets get started.
Open up all the supplies in Psp.
Bring up my Template/Delete the info layer & Duplicate. Close the original.
On the Black round Rectangle layer, Select/select all/float defloat.
Copy & paste a paper of your choice or the one included as a new layer.
Back onto the Black rounded rectangle & Adjust /blur/Gaussian blur - 10
Go to effects/ Plugins/ Penta.com - jeans -Amount 62 / Border width 4.
Click on the Grey Rectangle layer,. Selections/Select all/Float/defloat/Modify/ Expand 1.
New layer Choose a colour from your tube & fill.
Add a drop shadow. Do the same with the Light rectangle,
I just changed the Brightness - contrast to make it black.
Add a drop shadow & delete the Grey Rectangle.
Bring up your small chain links, Copy & paste as a new layer.
I added 3, Then x out all layers & merge visible.
Un x out all layers.
Click on your Grey Inner Bracket, And go to Adjust/Brightness - Contrast -
Brightness -255
Contrast 0. Add a drop shadow.
Click on Shape 2 Selections/select all/Float/defoat/Modify/Expand 1. Add a new raster layer.
Choose a colour from your tube & fill. Add a drop shadow & delete the original Shape 1 layer.
Do the same as above for the Smaller Inner Bracket & small shape only swap the colours around.
Go back to your Grey inner bracket. Select/select all/Float /defloat/Modify/Expand 2.
And add the paper again as a new layer only rotate it so the lines go across this time.
Resize the paper, Lower the opacity to about 60%. Selections/ Invert/delete.
Keep selected, Add your tube as a new layer/Delete. Add a drop shadow.
Do the same as above with the small inner bracket.
Now add the buttons & the safety pins & any other embellishments you would like to add.
X out background layer & merge all visible. Resize the tag by about 85%.
Now open a new blank canvas 550x550, fill with black.
Go to layers /New mask layer from image & find my mask EBD77.
Invert mask data checked & Source luminance checked.
Click ok, Merge group. Add a new raster layer and fill with another colour from your tube.
Do the same as above with the mask. Then go to image/rotate/Free rotate left or right 90 degrees.
Merge the 2 mask layers visible. Copy & paste as new layer on to your tag .
Move the mask layer slightly to the left/Duplicate/Image/Mirror/Flip.
X out background & tag layer. Merge mask layers & move above the background layer.
Turn all layers back on.
Now add your text and correct © info.
That's it finished, Save as a Jpeg or Png!
I hope you enjoyed my tutorial as much as I did writing it !!!
..Hugs Rachel..
Layout and Tutorial ©Rachel written on October 8th 2008.
Any similarities to this tutorial are purely coincidental & unintentional.
Registered with Tutorial Writers Inc.

Tutorial written in Psp9.
Supplies Needed.
Image of your choice, I am using the gorgeous art of Elias Chatzoudis.
You must purchase a license to use his art, You can purchase his art from MPT
Template & Mask - Here.
The Template & Mask are created by me, Please do not share in groups or E-mails.
If you would like to use them in your tutorials please put a link back to my website.
Filters: Texture Effects - Blinds- You can find this in your Psp!
Splat Brushes of your choice.
Font -Al Script Hand - ( Pay Font )- Not Supplied.
Ok let's get started.
Unzip all your supplies & minimise for now.
Open up a new blank canvas 700 x 650 (We can resize later). Fill with white.
Bring up your template, Copy & paste the thin black line as a new layer onto your new canvas.
Go to effects/Texture effects/Blinds :
Width 2/ Opacity 40/ Colour White/ Check Horizontal/ Ok.
Add a drop shadow.
I hope you enjoyed my tutorial as much as I did writing it !!!
..Hugs Rachel..
Layout and Tutorial ©Rachel written on January 3rd 2008.
Any similarities to this tutorial are purely coincidental & unintentional.
Registered with Tutorial Writers Inc.

Supplies
Paint Shop Pro - I'm using V9 but i'm sure it can be done in other versions.
My Supplies Here
Tube of your choice, I'm using the gorgeous art of Michael Calandra
You must purchase a license from My Psp Tubes to use his art, You can get it from Here
Bow - From Scrappy Expressions - Thank you Melissa.
Mask - Becky _Mask 022 -Thank you Becky.
Font of choice - I used Century Gothic ( Pay Font)
Animation Shop (Optional)
DSB Flux - Bright Noise (Optional )
Ok on with the tutorial.
Open all supplies in Psp & minimise for now.
Open a new blank canvas 600x600 and flood fill white. bring up the template & copy & paste
as a new layer.
Grab your preset shapes tool rectangle/Fill White or a colour of your choice. Draw out a rectangle
not too big ( check finished tag for reference) convert to raster layer. Change your magic wand to
the selection tool & choose rectangle ,draw around the inside of the rectangle Ex:
Make sure you leave plenty of space so that you can add your name/text later. Now hit delete.
keep selected, Bring up your image/tube copy & paste as new layer into the rectangle.
Selections/Invert /Delete/selections none. X out all layers except the image & rectangle, Merge visible.
Unhide all layers & place the rectangle into position. Add a subtle drop shadow.
Add the rest of the supplies and place where you think it looks best.
Add your name/text I used Century Gothic & spaced the letters out a little.
I also added 2 more pearls & resized them.
On the bottom layer add a new raster layer & choose a colour from your tube, Go to layers/
New mask layer/From image & find Becky _Mask 022.
Source luminance checked/Mask inverted checked. Layers /Merge Group.
I resized the mask layer by 85% but that is entirely up to you.
Add your watermark & correct © info, Resize tag if needed, save as a jpeg/png.
I also animated the mask layer using DSB FLUX Bright Noise. But that's up to you !
If you wish to animate , let's get on.
Open up Animation Shop
Ok Make sure you're on the mask layer , go to Effects/Dsb Flux - Bright Noise using these settings:
Intensity - 25
Mix - Checked
Ok.
Now go to edit/copy merged & paste as a new animation into Animation shop.
Back to psp edit/undo repeat the above step but click on mix 2 x's
edit/copy merged & paste after current frame in animation shop.
Again edit/undo repeat the above step but click mix 3x's.
In Animation shop Edit/select all & save as a gif !
That's it were finished !
I hope you enjoyed my tutorial as much as I did writing it.
Thank you
..Hugs Rachel..
Layout and Tutorial ©Rachel written on September 6th 2007 .
Any similarities to this tutorial are purely coincidental & unintentional.
Registered with Tutorial Writers Inc.
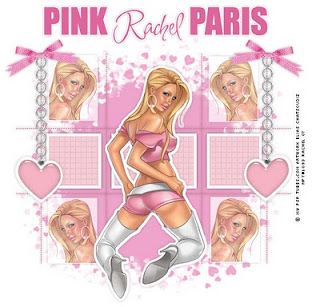
Supplies
I've written this tutorial using Psp v'9, I'm sure it can be done in other versions.
Tube of your choice, I'm using the beautiful art of Elias Chatzoudis
You must purchase a license from My Psp Tubes to use his art, You can get it Here
My supplies Here
which include Heart chain, template ,mask if this mask belongs to you or you know who's it is
could you mail me Here & let me know so I can give proper credit thanx,
Bow is from scrappy expressions, thank you melissa
Font of choice
Ok now on with the tutorial
Open up all supplies into psp
1, Open a new blank canvas 700x600 flood fill white.
Add a new raster layer & fill with a colour from your tube, I resized this layer 85%
find your mask heart burst
Layers/new mask layer from image/heart burst
source luminance checked/Mask inverted checked.
Layers merge group.
Now add the template as a new layer, you can colourize to match your tube/image.
2, Grab your preset shapes tool & choose the rectangle/ fill white.
Draw out a small rectangle ( check tag for reference ) convert to raster later.
Now grab your magic wand & select inside the white rectangle/selections/contract 10
Bring up your tube & take a piece from the tube, I used the head.
Selections invert/delete/Selections/select none.
X out all layers except the the white rectangle and the image & merge visible.
Duplicate them 3x's, so you should now have a total of 4 rectagles with the images.
Place into position ( check tag for reference )
X out all layer again except the 4 rectangles & merge visible. I changed the opacity to 68.
3, Now add the chains, heart, bows & any other embellishments .
Bring up your tube & resize if needed.
Now select your tube with the magic wand.
selections/select all /float/defloat/selections modify by 5 or 6 .Add a new raster layer & fill with
a colour of your choice, I used white add a subtle drop shadow.
X out all layers except the tube & the outline we just made. Turn all layers back on.
Add your text, watermark & the correct © Merge visible save as Jpeg or Png.
Finished !!
I hope you enjoyed my tutorial as much as I did writing it.
Thank you
..Hugs Rachel..
Layout and Tutorial ©Rachel written on September 5th 2007.
Any similarities to this tutorial are purely coincidental & unintentional.
Registered with Tutorial Writers Inc.
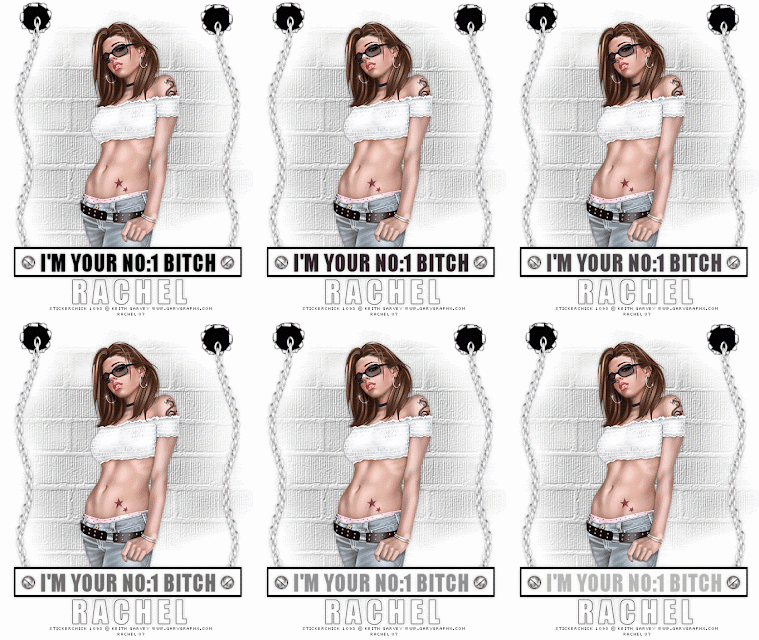
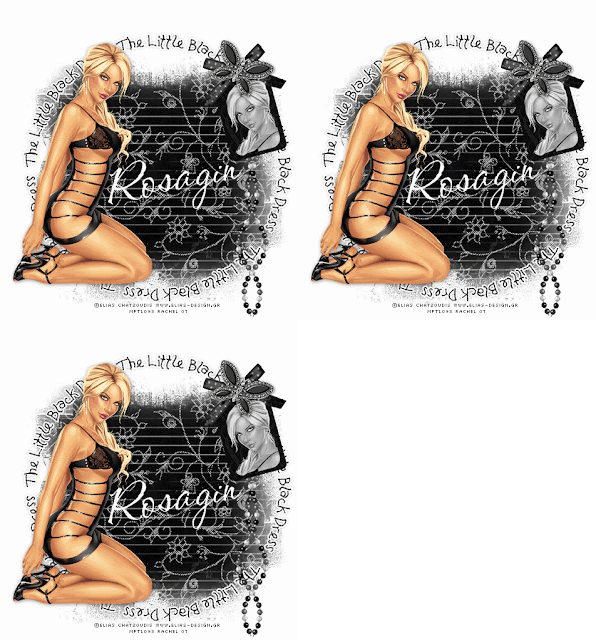
NO:1 Bitch
Supplies
Tube of your choice, I'm using the beautiful art of Keith Garvey
You must purchase a license from My Psp Tubes to use his art, You can get it Here
Supplies Here
Chain
Rip Hole
Screws -You can download some from Here
Mask - Becky _Mask 023 - Thank you becky.
Animation Shop
Ok on with the tutorial.
Open up my supplies tubes & minimise for now.
1, Open up a new blank canvas 400x400 & flood fill with #C0C0C0
Go to layers load from disk find Becky_mask 023
use these settings:
Source luminance checked.
Fit to layer checked.
Invert transparency unchecked.
Hide all mask checked.
Right click on layer palette & merge group,
copy & paste as a new layer onto 700x600 white canvas.
Effects/Texture effects/Texture use these settings:
Texture: Brick wall
Size 100%
Smoothness :0
Depth :1
Ambience : 0
Shininess : 0
Colour : white
Angle : 315
Intensity : 50
Elevation ; 30
Copy & paste your tube as a new layer resize if necessary & add a drop shadow.
2, Grab your preset shapes tool & draw out a rectangle [ see finished tag for reference]
Vector
Line width 5
Foreground Black
Fill White. Convert to raster layer & add a drop shadow.
Click on mask layer & add the chain , it should be underneath the rectangle you just made.
Duplicate the chiain /Image/Mirror. Place into position. No need for a drop shadow as it already has one.
Copy & paste the Rip hole and move it underneath the chain layer duplicate/Image/Mirror, place into position.
3, Now we can add some text, I used Impact/vector/ Fill Black/size 48 And typed out
I'm Your No:1 BITCH add a drop shadow, Copy & paste the screw into the rectangle/Duplicate /Image Mirror. Add a drop shadow.
Now you can either add your name/text/© info & leave as it is or go onto the Animation.
Animation
4, Open up Animation shop , Go back into psp & make sure you're on the text layer copy & paste this layer only into Animation shop as a new Animation.
Click on Insert Image Transaction/ FADE use these settings:
Animation Frame - Checked
Transition Length - 3.2 secs.
Frames per second - 2
This should contain a total of 6 frames.
Click ok.
You will have a total of 7 frames DELETE the 1st frame.
Go back into psp X out the text we just added to animation, click on the background layer
go to edit Copy Merged/ And paste into Animation shop as a new animation.
Duplicate your tag so you have a total of 6 frames.
Back onto to the text layer & edit select all,
Copy & paste into selected frame onto your tag make sure all layers are selected. Place in between the screws.
Resize if needed & save as a gif.
Were finished!!
I hope you enjoyed my tutorial as much as I did writing it !!!
..Hugs Rachel..
Layout and Tutorial ©Rachel written on August 3rd 2007.
Any similarities to this tutorial are purely coincidental & unintentional.
Registered with Tutorial Writers Inc.
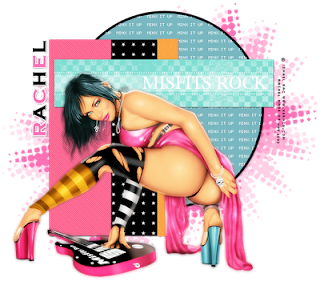
Tutorial written in Psp9.
Supplies Needed.
I am using the stunning art of Mr Ismael Rac.
You must purchase a license to use his art from MPT
- Template By Me please Do Not Share .Thank you ♥Filters: Optional.
Mu Ra's Meister - Copies.
Mask 147 - By Vix .
Thank you Vix ♥.
Brushes Of Choice.
Fonts - Will&Grace - Oh La la - Copper Plate Gothic Bold [Pay Font].
Ok let's get started.
Open up my template, Delete the Info layer. Add a new raster layer, Image/canvas size /750 x 700
Duplicate & get rid of the original.
On the circle layer select with your magic wand/Selections/Modify/Contract 1.
Selections/Modify/Smooth:
Smoothing Amount :10
Corner Scale:10
Anti-alias & Preserve Corners both Checked.
Add a new raster layer & fill with a colour from your tube, X out all layers except the Circle layer & the new layer you just filled & merge those 2 together.
Rename the merged layer to Circle.
Turn all layers back on.
Choose a pixel font, I used Oh La La at size 8/Anti-alias Off/ Create as Vector/Background colour White.
I wrote "MINX IT UP" Objects align/Centre in canvas/Convert to Raster layer.
Still on the text layer. Go to Effects/Plugging/MuRa's Meister/Copies:
Tiling:
Click on your circle layer with your magic wand/Selections/Modify/Contract 1.
Invert. Back onto to the text layer & click delete/Select none.
X out all layers and merge visible the txt layer and circle layer.
Make all layers visible again.
Click on the Grey shape layer. Selections/Select all/Selections Float /De float/Modify/Expand 1.
Add a new raster layer & fill with a colour from your tube.
Select none.
Now you can add brushes/text. I added penta: Jeans:
Amount :62 Border Width :4
Click on the white strip & do the same as above , Only change the colour.
Add a filter of your choice, I can't remember what I used lol..
Move the stars layer above the the grey shape.
On the grey strip layer use the same settings as above, Keep selected.
Add a new layer & add some nice brushes or text in a different colour/ Selections/Select none.
Delete the Grey strip.
All I did then was to add a white Rectangle to the width of the strip
[See finished tag for reference]& change the Blend Mode to Soft Light.
Then added 2 dotted lines & The Text "MISFITS ROCK"
Add your tube.
Open up a new canvas 550 x550 Fill with a colour of your choice,
Add the mask Vix Mask147 Merge visible.
Copy, Click on your main image canvas on the bottom layer & paste the mask as a new layer.
Place into position.
Add your text, Watermark & correct © info , Resize.
Save as Jpeg or Png!!
I hope you enjoyed my tutorial as much as I did writing it !!!
..Hugs Rachel..
Layout and Tutorial ©Rachel written on March 30th 2009.
Any similarities to this tutorial are purely coincidental & unintentional.
Registered with Tutorial Writers Inc.
•Enchant Me •
Categories
- .•. New Tutorial .•. (32)
- •Angie Monasterio Cilm• (1)
- •Anthony Guerra CDO• (1)
- •Anthony Guerra Cilm• (1)
- •Armando Huerta Mpt• (1)
- •Barbara Jensen• (5)
- •Bryan Hey Mpt• (1)
- •Chip Legal• (1)
- •Elias Chatzoudis mpt• (10)
- •Ismael Rac mpt• (5)
- •Jamie Kidd Cilm• (1)
- •Jennifer Janesko Cilm• (3)
- •Jessica Dougherty Cilm• (2)
- •Keith Garvey• (13)
- •Martin Abel Cilm• (3)
- •Michael Calandra Mpt• (1)
- •Michael Landedfeld Cilm• (1)
- •PinUp Toons Cilm• (1)
- •Suzanne Woolcott• (3)
- •Verymany (6)
- Banner Tut's (5)
About Me

- Rachey
- I'm 52 live in a lil village in South Yorkshire UK. I love going to gigs. Especially Rock or Punk..
Blog Archive
-
▼
2010
(40)
-
▼
April
(39)
- •• You Wanna Piece Of Me!! ••
- •• You've Been Punked !! ••
- •• Willing & Abel ••
- •• Valentine Love ••
- •• Valentine Girl ••
- •• Twinky Hearts ••
- •• The Little Balck Dress ••
- •• Swirly ••
- •• Sweetest Angel ••
- •• Strip Club ••
- •• Sorbet ••
- •• So Blue ••
- •• Simply Gorjuss ••
- •• Shimmers ••
- •• Sexy Cool ••
- •• Rebel Punk ••
- ••Purple & Black ••
- •• Pretty In Pink ••
- •• Pink Paris ••
- •• No1:Bitch ••
- •• Misfits Rock ••
- •• Metal Madiens ••
- •• Lilac Elegance ••
- •• It's All About Me ••
- •• Hearts That Glimmer ••
- •• Green With Envy ••
- •• Glam Diva ••
- •• Girls Just Wanna Have fun ••
- •• Fresh & Playful ••
- ••Flower Girl ••
- •• Fairy Cute ••
- •• Disturbia ••
- •• Disco Babe ••
- •• Atmospheric Desire ••
- ••Cute Emo ••
- ••Cinderella••
- ••Beautifully Wicked ••
- •• Beautiful Girls ••
- ••Baby I'm A Star ••
-
▼
April
(39)


