:::Welcome:::
Hello & Welcome to Enchanted Obsessions!
My new home for my tutorials, Masks from my old site Enchanted By Darkness.
Hopefully I will get some new tutorials up for you, If my mojo ever comes back!!
••••
Enjoy your visit!
Hugs Rachel
-x-
My new home for my tutorials, Masks from my old site Enchanted By Darkness.
Hopefully I will get some new tutorials up for you, If my mojo ever comes back!!
••••
Enjoy your visit!
Hugs Rachel
-x-
•Tut Obsessed •
Followers
Tuesday 10 May 2011
05:03 | Edit Post
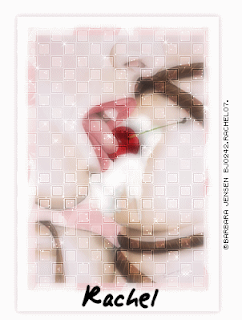
This Tutorial was created by Rachel on the 9th of October 2006.
Any resemblance to this tutorial is purely coincidental, And Unintentional.
The Beautiful artwork used is By Barbara Jensen, If you would like to use her work you MUST PURCHASE a license
Supplies
You will need psp i am using version 9 , I'm sure it can be done in other versions.
Animation shop .
- Plugin - Xenofox 2 - Constellation.
- Mask -Fractual 2 which you can download Here
- Brush - Of your choice - (sorry i can't provide the Brush )
-Tube- Image of your choice.
- Nice Font - I am using - AlphaMack AOE.
OK Let's go....
1, Open up a new Blank canvas - 600x400 i know this is big, we will re size it later.
Floodfill with white.
Copy & paste your -Tube/Image onto your white canvas.
Re size if needed.
grab your preset shapes tool using these settings:
Create on vector
Line style - solid-
Line width - 2.00 -
Foreground - white-
Background - a colour of your choice or the one I'm using - #E4B494.
Draw out a Rectangle not too big ,Layers /convert to raster layer.
[check finished tag for reference]
Click inside the rectangle with your magic wand.
Layers/Load save mask/
Find the fractual 2 mask use these settings:
Create mask from - source luminance checked.
Orientation - Fit to layer checked.
Options - use image value - Invert transparency unchecked.
On layer pallette/ Right click on mask layer & delete, Answer yes to the pop up.
Merge group.
2, Move the mask layer below the Tube/Image layer.
Move your Tube/Image to the left or where you think it looks best.
[see finished tag for reference]
Click on your bottom layer & go to preset shapes using same settings as before,
but change Foreground & background to white.
Draw out a nice sized rectangle .
[See finished tag for reference]
Add a drop shadow .
X out background layer & merge visible.
3, Duplicate your merged layer ,then go to Adjust/Blur/Gaussian Blur using these settings:
Radius - 5.00 -OK-
Over on your layer palette reduce the opacity of this layer to 60%
X out background layer & merge visible.
Now pick a brush, i used a grid brush,
Choose a nice colour from your Tube/Image i used # E4B494
Add a new layer underneath your merged image
Add your brush evenly at both sides of the image.
I cut off the excess with the selection tool. set at rectangle.
Now go to Effects/Edge effects/Enhance more. I did this 3x's.
Move this layer above the image layer and change the layer to Overlay.
If you want you can leave as it is add your Text any © info and save as jpeg..
Or you can animate.
Open up Animation shop.
4, Make sure you're on the top layer & go to Effects/ Plugins / Xenofox - 2- Constellation using these settings:
Star size - 2.16
Size variation - 6
Edge star density - 1
Overall star density - 1
Overdrive - 100
Twinkle Amount - 55
Twinkle Rotation - 45
Background Fill - Keep original image - checked.
OK
Now go to edit/copy merged & paste into Ani shop as a new animation.
Repeat the above steps 2x's ,Edit/Copy merged & paste After current frame each time changing the Random See.
Now check to see if you're happy with the animation !!
Go back to psp & do your text ,any © info & add your watermark , copy & paste into animation shop Duplicate 3 X's .
Then add to your tag !!!
That's it finished !!
I hope you enjoyed my Tutorial as much as i did writing it.
EnchantedByDarkness ©AllRights Reserved.2006
Labels:•Barbara Jensen• | 0
comments
04:50 | Edit Post
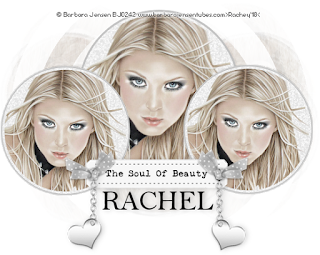
This Tutorial was created By Rachel 21st September 2006
Any resemblance to this tutorial is purely coincidental & unintentional.
i am using the beautiful artwork of Barbara Jensen
if you would like to use the work of Babara Jensen you must purchase a license Here
supplies
DSB FLUX - RADIAL TRANSMISSION
SIMPLE FILTER - 4WAY AVERAGE
TEMPLATE
FONT OF CHOICE
1, Open new blank canvas 700 X500 Floodfill white
grab your preset shapes tool use these settings:
Elipse
Create on Vector
Line width - 4
Choose 2 colours from your tube, i used
Foreground - white
Background - # C0C0C0
2, Draw out a nice sized circle , not too big.
[check tag for reference]
Layers /convert to raster layer.
Add a subtle drop shadow.
With your magic wand, click inside the circle
Tolerance/Feather - 0
3, Effects/Eyecandy 4000/Marble use these settings:
Vein size [pixels] - 3.00
Vein coverage - 63
Vein thickness - 61
Vein roughness - 60
Bedrock colour - # E5E5E5
Vein colour - white.
Seamless tile - checked.
OK
4, Keep selected.
Selections/Modify/Contract 5.
Bring up your Tube/Image ,
Copy & paste as a new layer.
Selections/Invert/Delete.
Selections/Select None.
5, X out Background layer & Merger visible.
Duplicate your Image & Re size 80% and move over to the right a little
[check finished tag for reference]
Duplicate again & move over to the left.
X out background layer & Merge visible.
Re size image 85%
6, Duplicate your image & on the Duplicated layer got to :
Filters/Effects/Simple/4Way Average
Click OK.
Layers/Arrange/Move down.
Making sure you're still on the duplicated layer go to :
Effects/DSBFlux/Radial Transmission/
Radial size - 20
Rotation - 20
Blend - 50
OK
Lower the opacity between 50-56
7, Open up your Soul of beauty tab & copy & paste as a new layer
Resize By 75% or which ever you think looks best & place into positions.
[see finished tag for reference]
Add the heart chain Re size about 60% or which ever you think looks best,
Duplicate/Image/Mirror.
Bring up your Ribbon Tube & copy & paste as a new layer.
Image re size 60% ,Image/Rotate /Free/18
Duplicate/Image /Mirror.
Place into position.
X out background layer & Merge Visible..
At this point i colourised mine :
Adjust/Hue & Saturation/Colourize:
Hue - 0
Saturation - 0
Re size your image 85%
8, Add your Text, Watermark & © info.
Merge Visible, Finished !!!
I Hope you have enjoyed my tutorial as much as i did writing it.!!
>Updated -29/9/18<
>Updated -29/9/18<
Hugs Rachel
Labels:•Barbara Jensen• | 0
comments
04:43 | Edit Post
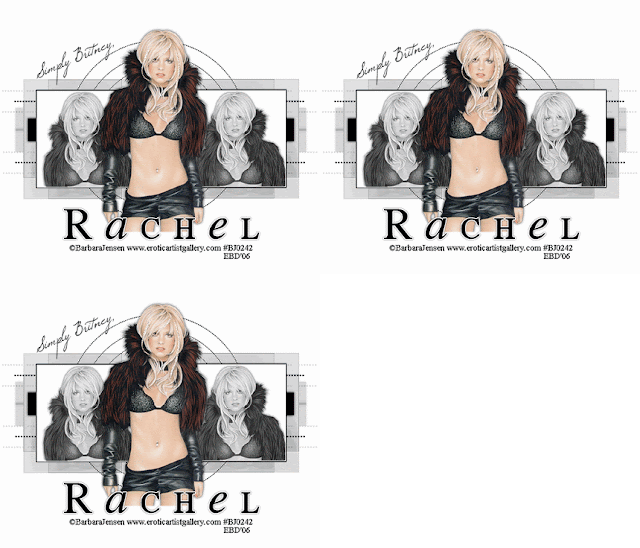
This tutorial was created by Rachel on the 20th July 2006.
Any resemblance to this tutorial is coincidental & purely unintentional.
I am using the Beautiful artwork by Barbara Jensen.
If you would like to use Barbara's artwork you must purchase a license
Please visit her site :Here
Supplies
Paint Shop Pro - I'm using version 9 ,but I'm sure it can be done in other versions.
Images/Tubes of your choice.
Toadies - What are you .
DSB Flux - Bright Noise[optional]
A Nice Font, I'm using Will&Grace.
1,Open a Blank canvas 200x200 & floodfill white.
Floodfill with a colour /gradient/pattern of your choice.
Grab your image & copy & paste as a new layer onto your canvas ,
resize if needed, add a drop shadow. I colourized mine ,but it's entirely up to you.
Add a border/Image/Add Border/ Black/Pixel size 2/Colour Black.
Layer Palette & Promote to layer.
2,Open a new Blank canvas 700 x 600 Floodfill white.
Copy & paste your image what you've just made as a new layer,Duplicate & place into position.
[See tag for reference]
X out bkg layer & merge visible.
Now grab your pen tool using these settings:
Create on vector layer.
Line style -DOT-
Line Width - 3-
Colour -Black-
draw out a line not too big [See tag for referance]
Convert to raster layer.
Duplicate /image flip Place into position.
Change to preset shape tool & choose Rectangle
Create on vector layer
Line width - 2
Line style - solid.
Foreground - null Bkg -Black.
Draw a long,thinish rectangle place into position .[See tag for reference]
Convert to raster layer.
X out your Bkg layer & your merged image & merge visible /layers arrange move down.
Turn all layers back on.
Add a suttle drop shadow & again turn of your bkg layer & merge visible.
Click on your background layer .
Go to preset shapes choose elipse using these settings:
Create on vector
Linestyle - DOT -
Line width - 2 -
Colour - Black-
Background unchecked.
Draw out a nice sized circle not too big.
[See tag for reference]
Convert to raster layer.
Duplicate & resize by 85%, & again duplicate & re size 85%.
X out all layer except the circles & merge visible.
Turn all layers back on.
3, Back to our images we merged earlier & duplicate
Make sure you're on the copy layer.
Effets/Toadies/What are you/
using thses settings:
X Dose -20
Y Dose - 20
Layers arrange/Move down.
4,OK now add your Tube/Image, place into position & add a drop shadow.
[check tag for reference]
X out background layer & mergevisble.
Add your name,watermark & any © info.
Re size if needed.
I added some Noise to my Britney !!
OK that's it were done
Labels:•Barbara Jensen• | 0
comments
04:37 | Edit Post
Artwork used Martin Abel.
This Tutorial was created By Rachel on the 23rd May 2006.
Any simularities to this tutorial is purely coincidental & unintentional.
The image used is By the Talented artist Martin Abel,
If you are interested in using his work you must purchase a license,
Here : CDO
Supplies
Paintshop pro v.9, But i'm sure it can be done in other versions.
Tube/Image of your choice.
Font - I'm using AL Sandra
Alien Skin Eye candy 5 - Impact- Gradient Glow.
OR
Eye candy 4000 - Gradient Glow .
Ok let's get on with the Tutorial.
1, Open a new blank canvas 600x400, Floodfill with White.
Preset shapes /Rectangle
Create as Vector,
Line style / Diamond / Width -2-
Foreground - Black -
Background - Null -
Draw out a nice sized Rectangle .
[Check finished tag for reference]
Layers/Convert to raster layer.
Change the line style to solid & change background to white.
Draw out another Rectangle a bit smaller.
[Check finished tag for reference]
With your magic wand click inside the rectangle,Selections/Modify/Contract - 5 -
And floodfill with - #C0C0C0.
Selections,select none.
Go to effects/Texture effects/Blinds.
Using these settings :-
Width - 2
Opacity - 44
Colour - White
Horizontal/Light from Top Left - Both Checked.
ok.
2, Preset shapes/Rectangle -same settings as above, but change foreground to - Black ,
& Background - White.
Draw out another Rectangle a bit smaller than the previous one, convert to raster layer.
Add a drop shadow of your choice.
Preset shapes/ Keeping settings as before, But swap the colours round.
Foreground - White -
Background - Black -
Draw out another smaller Rectangle/Square.
Layers/convert to raster layer.
Click inside the Rectangle/Square, we just made.
Selections/Modify/Contract By- 5-
Copy & paste your tube/image as a new layer.
Making sure you're on the selected layer, go to Selections/Invert - DELETE.
Back on to your tube layer & change the Opacity to between - 45/50.
3, Copy & Paste your tube as a new layer .
Re size if required.
Add a drop shadow with these settings : -
Vertical/Horizontal - 0.
Opacity - 50
Blur - 13.00
Colour - Back -
[Optional]
I added a Gradient Glow to the drop shadow.
Effects/Eyecandy 5 - Impact - Gradient Glow :-
Basics -
Both - checked.
Mask selection - checked.
Glow Radious - 5.00
Soften corners - 0.00
Overall opacity - 100
Distortion amount - 0.00
Distortion Lump size - 0.00
Smoothness - 100.
Colour - white.
Eyecandy 4000 - Gradient Glow settings -
Glow width - 3.00
Soft corners - 0.00
Overall opacity - 100
Colour - White.
4, Choose a nice Handwriting font .
Size - 20
Create as vector.
Foreground - Null
Background - Black.
Type your Name/ Text/Saying.
I wrore the word Angel 4 x's & Rested it on the top line..
Layers/Convert to raster layer.
Duplicate your text/Flip /Mirror.
X out all layers except the text layers & merge visible.
Selections/Select all/ Float/defloat/ Modify/Expand 3.00.
Add a new raster layer /Layers arrange/Move down. Floodfill with white,
selection/select none.
Merge visible.
Add the same drop shadow as in step 3.
Turn all layers back on /Merge visible.
Move the text layer Below your tube layer.
Add any � & your watermark.
Re size & you're finished !!!
I hope you enjoyed my tutorial as much as i did writing it ...
Thankyou
.:Rachel:.
Labels:•Martin Abel Cilm• | 0
comments
04:10 | Edit Post
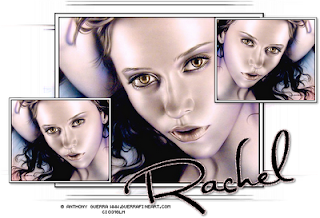
This Tutorial was created By Rachel on the 25th June 2006.
Any similarities to this tutorial are purely coincidental & unintentional.
Images used are By the Talented Artist Anthony Guerra.
Supplies Needed.
Paint shop pro i used v.9, but I'm sure it can be done in other versions.
Filter /Toadies/What are you.
Image /Tube of your choice.
Font, I am using Al Sandra
Let's get started.
1, Open up your Image/Tube /Duplicate & save for further use .
Re size as needed .
Go to image /add borders/
Colour - Black.
Size - 2 .
Symetric - checked.
Repeat but change border size to 6 & choose a light colour from your tube/image.
Repeat but change back to black & size at 2.
Layers/ promote to background layer.
Image canvas size 600 x 400 ,new raster layer move down & floodfill with white.
add a drop shadow to your image :
V/H - 0.
Opacity - 40.
Blur - 12.00.
Colour - Black.
2, Layer /Duplicate your image , make sure you're on the duplicated layer.
Effects/Toadies/what are you:
X Dose - 20
Y Dose - 20
Duplicate this layer/Effects/Distortion effects/Wind:
Wind Direction - From left.
Wind Strength - 100
On your second Duplicated layer, Repeat above steps but change Wind Direction to From Right.
X out White background layer & your main image/Tube.
And merge visible, Un X out layers.
3, Duplicate main Image/Tube and re size by 70% 2x's & place into position.
[ Check finished Tag for reference]
X out all layers apart from the main image & the last 2 layers we just did/Merge visible.
Un x out all layers & add a Drop shadow same as in step 1.
4, Add your text i used the Font Al Sandra
Create as vector.
Size 48.
Stroke width 2.0
Foreground - Null
Background - Black.
Place into position & convert to raster layer.
[Optional]
Still on your text layer/Selections/select all/ Float/Defloat/Selections/Expand - 2.00
Add a new raster layer & floodfill with white or a colour of your choice.
selections/select none/layers/move down, Add a drop shadow use same settings as above.
X out all layers except your text layers & merge visible.
Now add your watermark & any © Info & save as Jpeg.
That's it were finished !!!
I hope you enjoyed my tutorial as much as i did writing it.
* Rachel *
Labels:•Anthony Guerra CDO• | 1 comments
03:37 | Edit Post
This tutorial was created by Rachel on the 15th May 2006.
Any similarities to this tutorial is purely coincidental & unintentional.
Artwork is by the Artist Barbara Jensen,
If you are interested in her using her work you need to purchase a license.
Please visit her site :Here
Supplies
I am using Paint shop pro v.9, i'm sure it can be done in other versions.
Tube/Image of your choice.
Font- Bank Gothic, or one of your choice.
Filter- DSB/ Flux-Linear Transmission.
Ok on with the tutorial.
1,Open new Blank canvas 600x400 we can resize later.
Floodfill with white.
Add a new Raster layer/selections tool/Rounded Rectangle/Feather 0
Draw out a nice sized Rectangle
[see finished tag for reference]
Floodfill with a colour of your choice.
I used #ECF9E5
Selections Modify/Contract/10
Floodfill with white
Repeat but change colour back to the 1st one.
Keep selected & add your tube/image as a new layer.
Selections/invert/delete/selections select none.
X out background layer & merge visible.
Add a drop shadow:
H/V - 0
Opacity - 73
Blur - 12.00
Colour - #C0C0C0
Image/Rotate/Right/10.00
2, Go to preset-shapes & choose Rectangle
Stroke & Fill - #ECF9E5
Vector - checked.
Line - Solid
Width - 1
Draw out a Rectangle not too big.
[Check Finished Tag for reference]
Layers convert to raster layer
Add a drop shadow with these settings:
Vertical - 21
Horizontal - 17
Opacity -20
Blur - 12
Colour - #C0C0C0
Duplicate/Re size/60%
Duplicate/Re size/60%
And again but leave at 60%.
Place into position.
[Check Finished Tag for reference]
X out the big rectangle & background layer & merge visible.
Making sure you're still on the merged layer click inside the squares with your magic wand.
Selections/Modify/10.
Copy & paste your tube as a new layer over the squares,place into position /selections /invert/delete.
Selections/select none.
X out the background & the main image & merge the small squares & the tube...
Place into position.
[Check Finished Tag for reference]
3,Now choose a darker colour & draw out a square.
Stroke,Fill - #A9ECAC
Move this layer above your white background layer.
Effects/DSB Flux/Linear Transmission.
Play about with the settings,
or use mine:
Slice -6
Offset - 13
Blend - 50
Horizontal - checked.
[Optional]
I also used the deformation tool & made the transmission more square .
Lower the opacity of this layer between 15/20, which ever you think looks best.
4, Now add the charm & the word beautiful ....
I re sized 85%
Add your name
e/text,© info & watermark.
Re size to your liking 

Merge visible.
Finished !!
Here is my finished Tag !!!
I hope you enjoyed my tutorial,as much as i did writing it...
Thanx Rachel...
Labels:•Barbara Jensen• | 0
comments
03:27 | Edit Post
This Tutorial was created By Rachel on the 25th April 2006
Any similarities to any other Tutorial are purely coincidental & Unintentional...
Supplies
Psp I'm using version 9, but i'm sure it can be done in other versions.
Tube of your choice/Image.
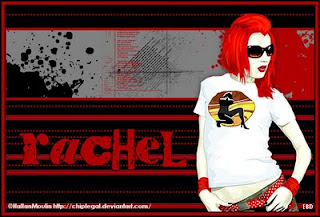
I am using the art of 'Hallan Moulin'
Brushes Of Choice
Font - CryKitty - Here
Ok on with the Tutorial,
1, open new blank canvas 600 x 400 & Floodfill - #C0C0C0 or colour of your choice.
Add a new raster layer & Floodfill with black.
Make sure you're on the black layer & grab your selection tool,Draw out a selection then hit delete.
[See finished tag for reference.]
2,Go to your selection tool & choose Rectangle,
Vector checked.
Line style - Solid.
Width - 4.00
Foreground -#AF0102.
And Background -Null.
Draw out a rectangle the size of the selection you just made & convert to raster layer.
3,Now click on the Black layer, Click inside with your magic wand.Tolerance & Feather 0.
Keep Selected.
4,Add a new Raster Layer & Choose two contrasting colours from your tube.
And your Brushes...
Selections/SelectNone.
5,Copy & Paste your tube as a new layer,Add to were you think it looks best.
[OPTIONAL]
Add a drop Shadow with these settings:
V&H -0
Opacity - 66
Blur - 14.00
Colour Black.
6, Grab your pen tool,using these settings:
Line style - Dots.
Width - 3.00
Create as vector.
Foreground -#AF0102.
Background - Null.
Now draw out some lines,
[See finished tag for reference.]
Convert to raster layer,Layers/arrange/Movedown.
7, Staying with the pen tool,
change the line to Solid & width to 10.
Draw out some more lines.
[See finished tag for reference.]
Convert to raster layer.
8,Makins sure you're still on the lines layer we just did,
Effects/Edge Effects/Enhance More 2x's.
9, Time to add our text.
Choose a nice font or the one i'm using,
using these settings:
Create as vector.
Size - 30
Stroke width - 1.0
Foreground - Black
Background -#AF0102.
Put were you think it looks best.
Layers,Convert to raster layer.
Add your © Info & Watermark.
10, Add a border,
Image/Add borders/
Black
Symetric - checked.
Pixel Size - 2
And another,
change colur to -#AF0102.
Pixel size - 6
And again but change colour back to Black & size to 3.
That's it were finished save as a jpeg !!!
I hope you enjoyed my tutorial as much as i did writing it !!!
Thanx Rachel
©AllRightsReserved EnchantedByDarkness.2006
Labels:•Chip Legal• | 0
comments
Subscribe to:
Posts
(Atom)
•Enchant Me •
Categories
- .•. New Tutorial .•. (32)
- •Angie Monasterio Cilm• (1)
- •Anthony Guerra CDO• (1)
- •Anthony Guerra Cilm• (1)
- •Armando Huerta Mpt• (1)
- •Barbara Jensen• (5)
- •Bryan Hey Mpt• (1)
- •Chip Legal• (1)
- •Elias Chatzoudis mpt• (10)
- •Ismael Rac mpt• (5)
- •Jamie Kidd Cilm• (1)
- •Jennifer Janesko Cilm• (3)
- •Jessica Dougherty Cilm• (2)
- •Keith Garvey• (13)
- •Martin Abel Cilm• (3)
- •Michael Calandra Mpt• (1)
- •Michael Landedfeld Cilm• (1)
- •PinUp Toons Cilm• (1)
- •Suzanne Woolcott• (3)
- •Verymany (6)
- Banner Tut's (5)
About Me

- Rachey
- I'm 52 live in a lil village in South Yorkshire UK. I love going to gigs. Especially Rock or Punk..
