Tube of choice - I used Amber Extended version By Foxxy Dog Here
Mask- 134 By Millie Here
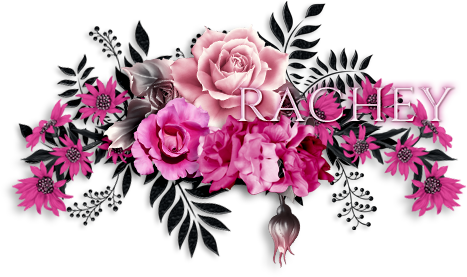
Fonts of choice - I used Weltron Here
Texture of choice- Here
Splatter Brushes -Here or Here [Download is on left hand side]
You will need to convert the brushes with Brush converter- abrViewer Here
Filter-Background Designer 4-Grid Here
Put filters in Filters Unlimited 2.
-------
Always check my finished tag for placement of Elements.
Add dropshadows to your liking & sharpen after resizing.
From now On I will just put the element Name or Number & Resize %
As it get's pretty long & to be honest boring Lol..
You will need a good working knowledge how psp works. It can be done in any version, I use psp9.
-------
Open new Image 800x250 fill with white.
Bring up spray_splatter_brush_pack_by_outlinez_7
Resize 30% paste on to canvas,Place to the right.
Bring up spray_splatter_brush_pack_by_outlinez_6
Resize 30% paste on to canvas,Place to the left.
Bring upspray_splatter_brush_pack_by_outlinez_3
Resize 30% paste on to canvas,Place in position.
Layers move down 2 times & Rotate 90 Degrees to the Right.
Your Image should look something like this.
Just play around with the splatters.
Cross out the white BG layer & merge splatters visible.Unhide the white BG.
On the white BG layer go over to your crop tool
Snap crop rectangle to Merged Opaque Then click Apply, It's the Tick on the left . Rename this layer "Splatter".
Bring up your Texture & paste as a new layer on your canvas , This should be your top layer.
Click on the splatter we just made. Selections/SelectAll/Float/Defloat/Invert.
Click back on the Texture layer & Delete, Deselect.
Hide the splatter later.
So now it should look something like this.
Again using the the crop tool with the same setting as above.Rename "Texture Splatter".
Making sure you're On the white BG layer add a new raster layer & select all.
Paste your tube/Image into the selection, Keep selected.
Now go to Adjust/Blur/Gaussian blur/Radius 30%,Select None.
Filters/Fliters Unlimited 2.0 -BKg Designers sf10 1V-Grid:Default settings.
Bring up your tube/Image again making sure you are on the top layer & paste on to canvas.
My tube is pretty big, I resized by 50% placed where you like.
On the Texture splatter layer selections/select all/Float/Defloat/Invert.
Click back on the tube layer & delete select none.
Still on the tube layer change the blend mode to overlay or one of your choice.
Duplicate & on the copy go to adjust/Gaussian-Radius 5.00.
I changed the Blend mode to Screen.
I added Penta.com-Jeans/Default setting on the top tube.
Make a gradient with 2 colours from your tube.
My colours- FG-#fec3d4 -BG-#edeb7f
Add a new raster layer on top & fill with your gradient.I changed the blend mode to Multiply -Opacity 26.
Again add a new layer on top fill with your gradient.
Selections/Select all/Modify by 2 pixels delete.
You can leave it as it is or add Elements/Brushes or wording of choice.
Add your Text/Name & ©.
If
you are having any problems with this tutorial or would like to share
your results for me to add to my Blog please contact me Here Thank you, Hugs Rachey♥
Tutorial By Rachey written on September 8th 2022. Using PSP9
Any similarities to this tutorial are purely coincidental & unintentional.


0 comments:
Post a Comment